Trace object
Parameters
Trace object creation works in the same way as Plane creation.
You need to click in viewport to define one corner of Trace objects, move yout cursor and click again to define opposit corner.
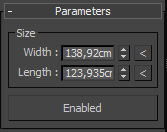
Width: Define width of Trace object. Using button with arrow you can set Width accordingly to Trace map and Length property, so Trace object will have the same aspect ratio as Trace map.
Length: Define length of Trace object. Using button with arrow you can set Length accordingly to Trace map and Width property, so Trace object will have the same aspect ratio as Trace map.
![]()
Bitmap / Texture map
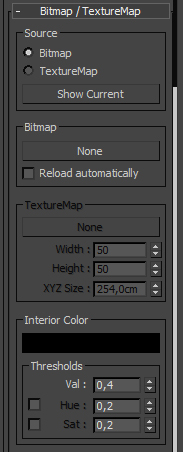
Bitmap Source: Defines Bitmap image as Trace map. Bitmap image can be loaded from folder.
None button: Click to None button to define Bitmap image.
Reload automatically: Reload and retrace image if it was edited. For instance you can Edit your image in Photoshop and when you will save it, it will be retraced in 3ds Max automatically.
Texture Map Source: Defines Texture Map as Trace map. You can create Texture map in Material editor using Procedural maps or any other available maps and then use it as Trace Map.
None button: Click to None button to open Material\Map browser to define Texture map. Ou also can drag&drop texture map from Material Editor to None button.
Width: Defines width detalization for Trace object.
Height: Defines height detalization for Trace object.
XYZ Size: Defines scale for loaded Texture map.
Interior Color: Trace object will trace defined color to Interior Elements. Black is default value.
Value threshold: You can add some Value range to Interior color using this property.
Hue & Saturation thresholds: You can add some Hue and Saturation range to Interior color using this property.
![]()
Interior properties
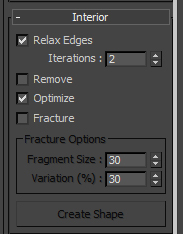
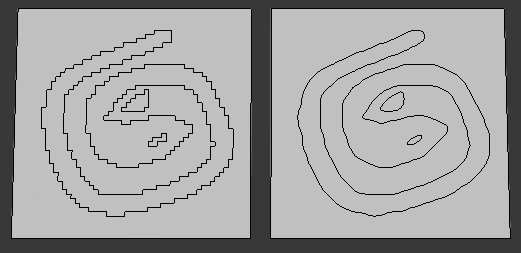
Relax Edges: Smooth edges between Interior and Exterior elements.
Remove: Removes Interior elements.
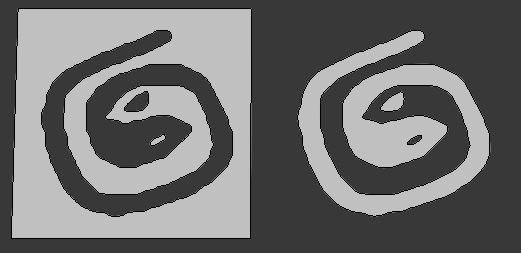
Optimize: Removes unneeded faces on Interior elements.
Fracture: Fracture Interior elements to smaller elements.
Fragment Size: Defines maximum amount of pixels per fracture element.
Variation: Add some variation to Fragment Size in percents from Fragment Size value.
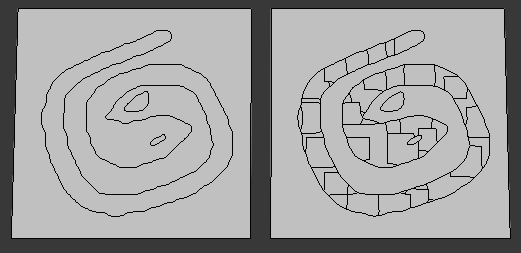
Create Shape: Create Spline Shapes using Interior element's border edges.
![]()
Exterior properties

Remove: Removes Exterior elements.
Optimize: Removes unneeded faces on Exterior elements.
![]()
Exterior properties
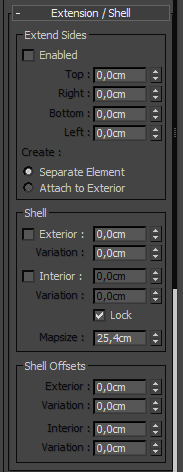
Extend Sides: You can extend all four sides of Trace object to have traced only small part of whole object.
Separate Element: In this case extebned faces will be separated as element.
Attach to Exterior: In this case extebned faces will be attached to all connected exterior elements.
Shell: Add shell to Exterior and/or Interior elements. Using Variation spinner you can add some variation per element.
Lock: Interior Shell is locked to Exterior shell by default, but in somce cases you may need different shell for Interior and Exterior. In this case you can unlock them and set custom Shell for Interior.
Map Size: Defines mapping scale for shell faces.
Offset: Offset Exterior and/or Interior elements. Using Variation spinners you can randonly offset Interior and Exterior elements.
![]()
Output selection
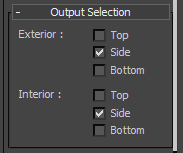
You can set custom output selection for faces to use them later as emitters for particles.
By default only inner shell faces will be selected.
But you can add or remove other faces, like Top (Front) faces and Bottom (Back) faces, both for interior and exterior elements.
![]()
Advanced parameters
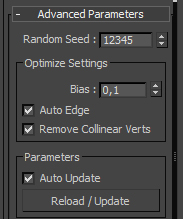
Random seed: Defines random seed for all variation spinners.
Optimize settings: Defines default properties for Optimize function, better to keep them as is.
Remove Collinear vers: Optimize geometry by removing vertices which are collinear and do not enhance geometry anyhow.
Auto Update: If this checkbox is On you get interactive feedback whenever any parameter is changed.
Reload / Update : Working with big trace maps it is reasonable to turn Auto Update off, set all paramenter as you want and then Update Trace object manually.
![]()
Video tutorial